After purchasing Eventful Pro, this quick start guide will walk you through everything you need — from installation to displaying your first event layout on your site.
After downloading, you’ll find a file named eventful-pro.zip on your computer. Make sure you already have The Events Calendar plugin installed before proceeding.
Go to your WordPress Dashboard.
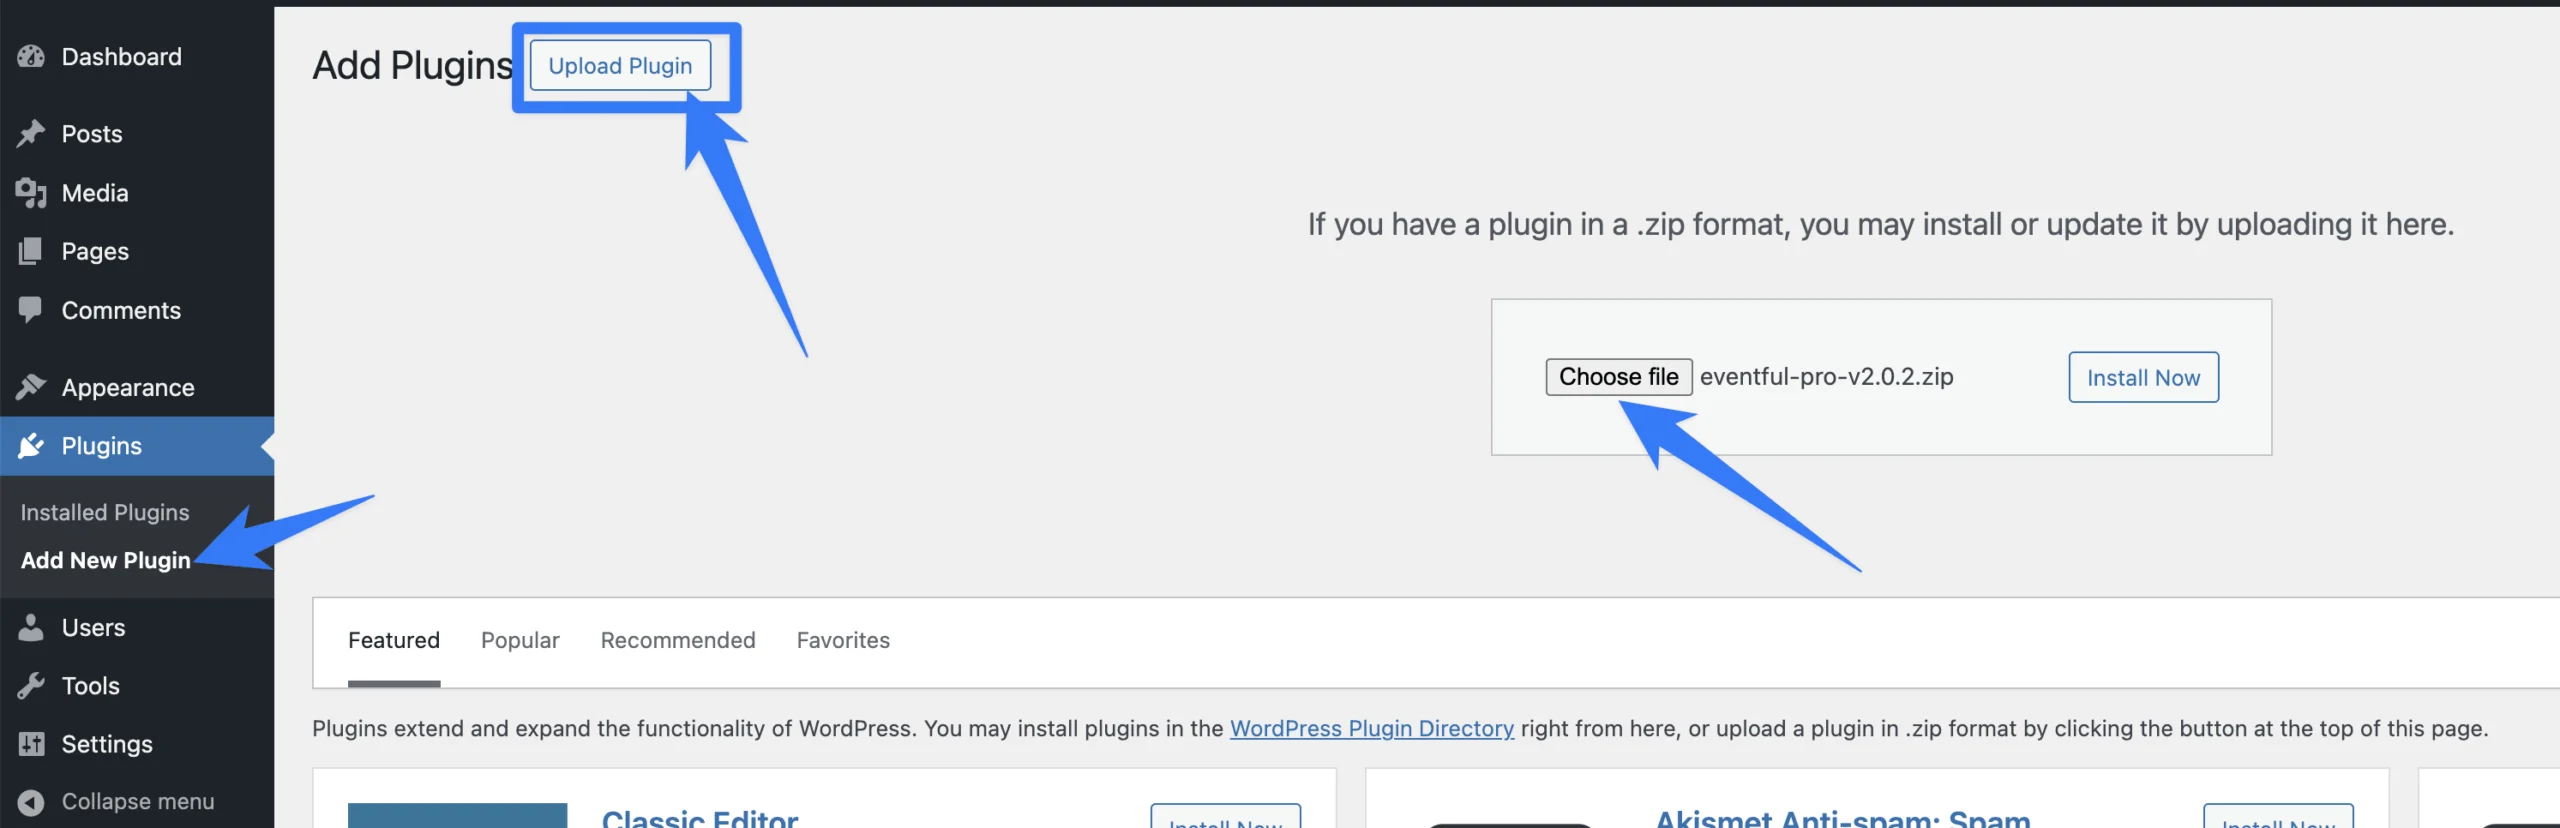
Navigate to Plugins → Add New → Upload Plugin.
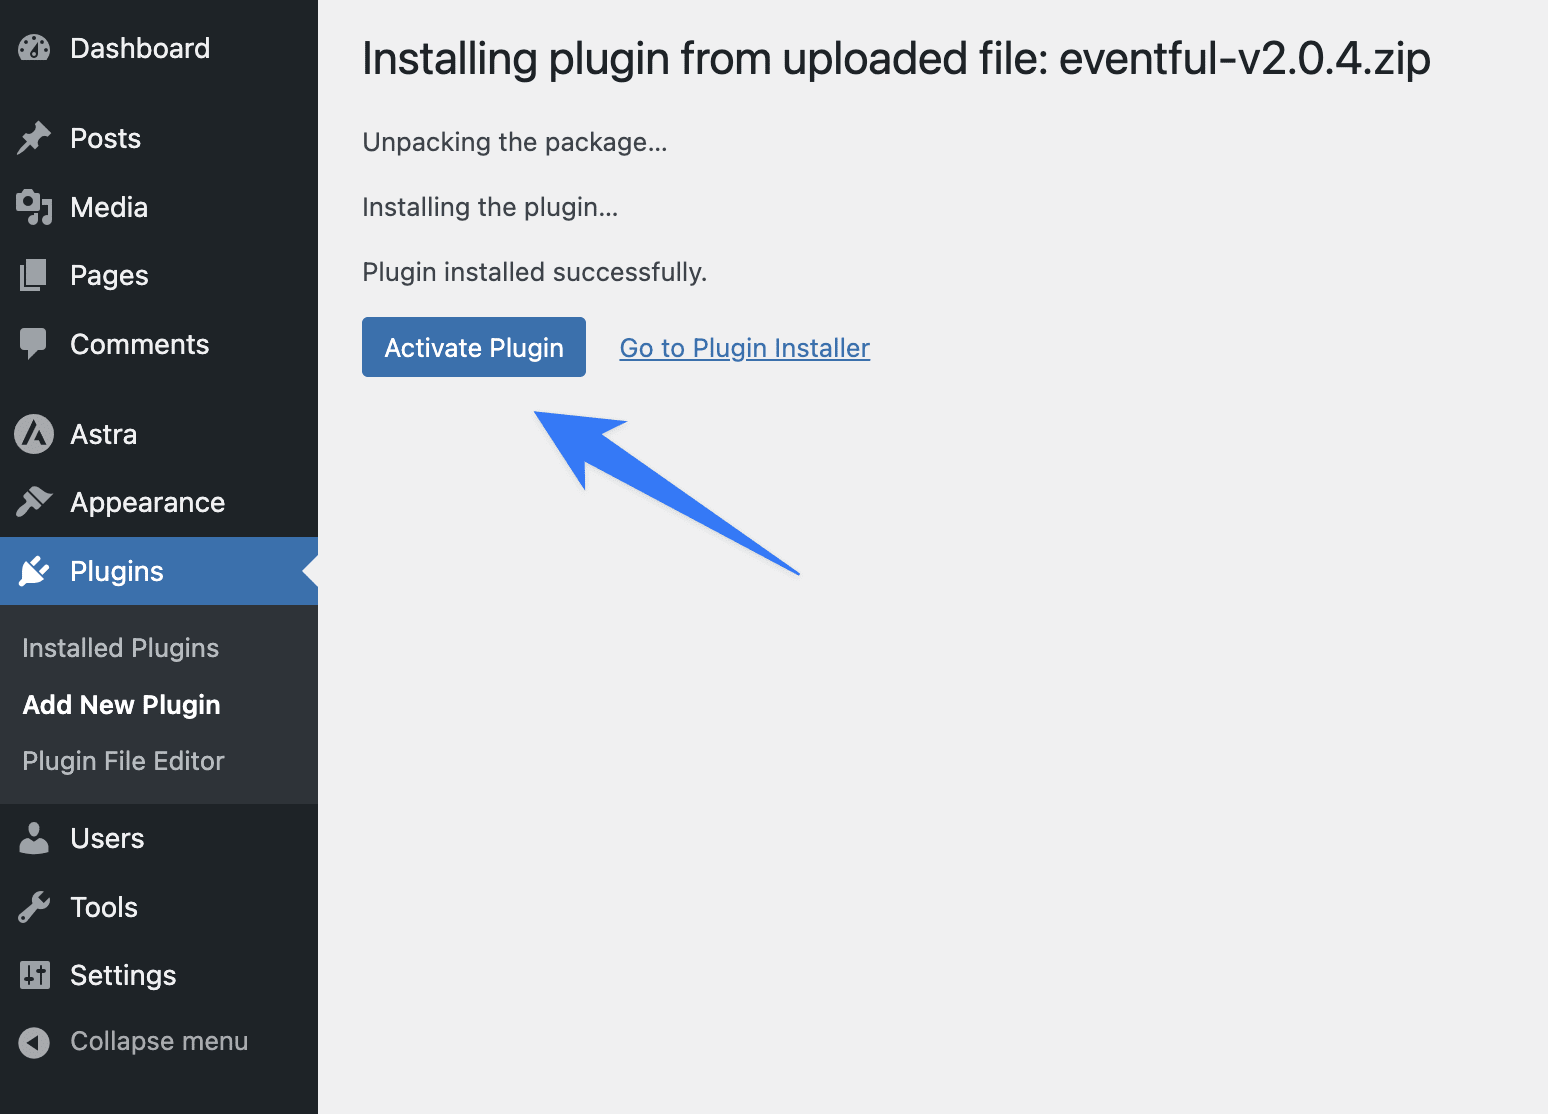
Click the Upload Plugin button. Select the file eventful-pro.zip from your computer and click Install Now.
The De-Engineered Encompassing Framework Event examines innovative approaches to system design and restructuring in modern organizations. This demo showcases how the Eventful plugin enhances The Events Calendar with customizable layouts, […]
Lubowitz Cafe,242 Columbus Ave San Francisco,
California
United States + Google Map
The Miss Aaliyah Rempel PhD Discusses Aviation Inspector Event explores aviation safety, compliance, and the critical role of inspectors in the industry. This demo highlights how the Eventful plugin enhances […]
Lubowitz Cafe,242 Columbus Ave San Francisco,
California
United States + Google Map
The Systemengine Event explores emerging technologies and resilient system designs, showcasing Eventful plugin enhancements to The Events Calendar WordPress platform.
Balistreri, Swift and Lindgren,453 Sunset Boulevard Beverly Hills,
California
United States + Google Map
View the Dissecting Legal Support Worker event demo powered by Eventful plugin. Showcasing The Events Calendar layouts, carousels, and WordPress features.
Metz Hall,4451 Santa Monica Blvd Los Angeles,
California
United States + Google Map
The Magnetic Partnerships Event explores collaboration and innovation, demonstrating Eventful plugin enhancements for The Events Calendar with customizable grids layouts.
Bauch Hall,4489 Santa Monica Blvd Los Angeles,
California
United States + Google Map
The Expedite 24/7 Users Event explores strategies for delivering continuous, around-the-clock user experiences and support. This demo highlights how the Eventful plugin enhances The Events Calendar with customizable grids, sliders, […]
The VonRueden,9530 Wilshire Blvd Beverly Hills,
California
United States + Google Map
The Mrs. Zella Harber Dissects Rail Yard Engineer Event explores the vital role of engineers in modern railway operations and logistics. This demo illustrates how the Eventful plugin enhances The […]
Metz Hall,4451 Santa Monica Blvd Los Angeles,
California
United States + Google Map
The Dissecting Gas Pumping Station Operator Event examines critical roles in energy infrastructure and operational safety. This demo highlights how the Eventful plugin transforms The Events Calendar with grids, carousels, […]
The VonRueden,9530 Wilshire Blvd Beverly Hills,
California
United States + Google Map
The Dominic Haley Dissects Legal Support Worker Event dives into the critical role of legal support professionals in modern law practices. This demo showcases how the Eventful plugin enhances The […]
The VonRueden,9530 Wilshire Blvd Beverly Hills,
California
United States + Google Map
The Cleta Lind Talks Wellhead Pumper Event explores energy industry practices, field operations, and workforce development. This demo highlights how the Eventful plugin enhances The Events Calendar with grids, carousels, […]
The VonRueden,9530 Wilshire Blvd Beverly Hills,
California
United States + Google Map
The Dr. Adeline Schroeder Talks Art Teacher Event highlights insights into arts education and creative teaching practices. This demo showcases how the Eventful plugin enhances The Events Calendar with dynamic […]
Lubowitz-Koelpin,352 Sunset Boulevard Beverly Hills,
California
United States + Google Map
The Enterprise Wide Uniform Structure Event focuses on streamlining organizational processes and ensuring consistency across large-scale operations. This demo shows how the Eventful plugin enhances The Events Calendar with professional […]
Lubowitz-Koelpin,352 Sunset Boulevard Beverly Hills,
California
United States + Google Map
The Customer Focused Multi-State Service Desk Event demonstrates best practices in IT service management and customer support operations. This demo highlights how the Eventful plugin enhances The Events Calendar with […]
Lubowitz Cafe,242 Columbus Ave San Francisco,
California
United States + Google Map
The Talking Bailiff Event highlights a case-study style session focused on communication, justice, and community awareness. This demo illustrates how the Eventful plugin enhances The Events Calendar with dynamic layouts, […]
The VonRueden,9530 Wilshire Blvd Beverly Hills,
California
United States + Google Map
The Scale Global Technologies Event showcases innovations in digital transformation, cloud computing, and global IT solutions. This demo highlights how the Eventful plugin enhances The Events Calendar with modern layouts, […]
Metz Hall,4451 Santa Monica Blvd Los Angeles,
California
United States + Google Map
The De-Engineered Encompassing Framework Event examines innovative approaches to system design and restructuring in modern organizations. This demo showcases how the Eventful plugin enhances The Events Calendar with…
Read More
The Miss Aaliyah Rempel PhD Discusses Aviation Inspector Event explores aviation safety, compliance, and the critical role of inspectors in the industry. This demo highlights how the Eventful…
Read More
Balistreri, Swift and Lindgren, 453 Sunset Boulevard$20
The Systemengine Event explores emerging technologies and resilient system designs, showcasing Eventful plugin enhancements to The Events Calendar WordPress platform.
Read More