

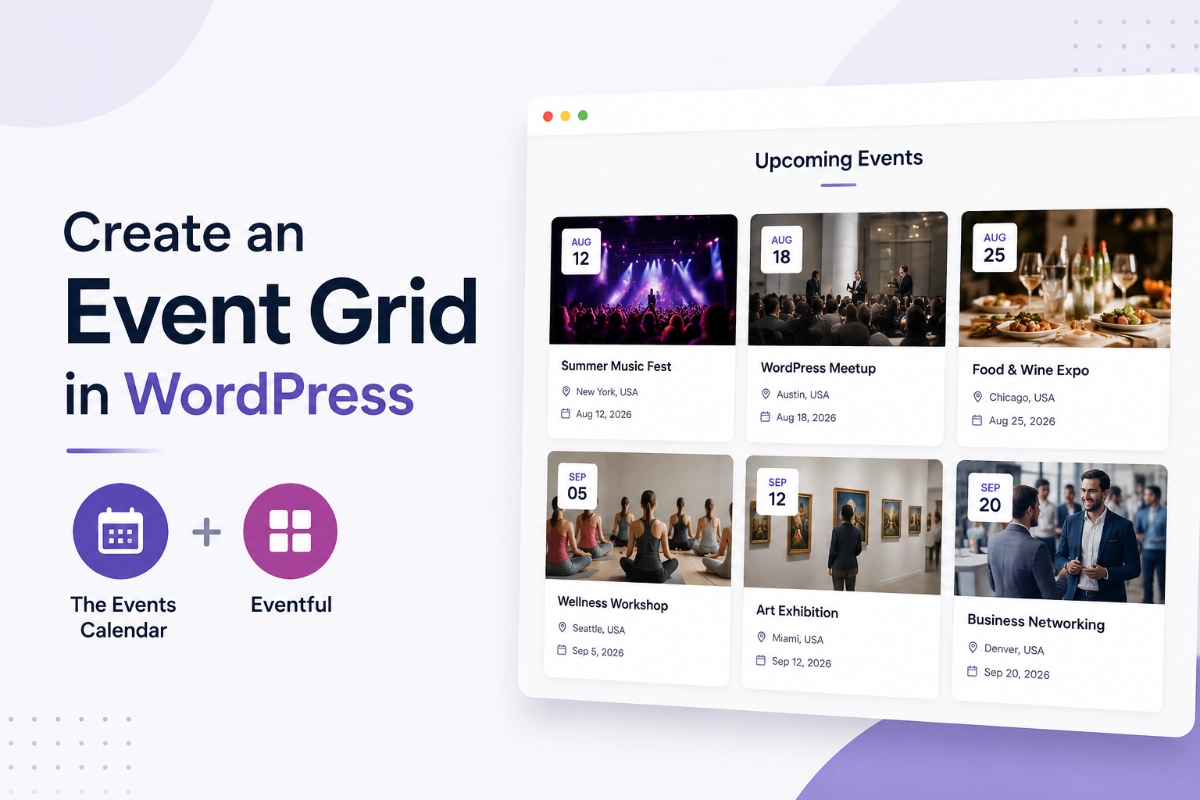

The Events Calendar is publishing your events just fine. The problem is how they look everywhere else on your site — a plain list or a tiny calendar square, when what you actually pictured was a row of clean, clickable cards. Building an event grid in wordpress sites can use without hiring a developer is simpler than it looks, and the software required costs $0.
This walkthrough uses The Events Calendar (which you likely already have) plus Eventful, a free display add-on, to turn your existing events into a responsive card grid in nine steps. No PHP, no custom CSS, no page-builder plugin required.
Key Takeaways
- The Events Calendar’s free plugin includes Month, List, and Day views, but no dedicated card-based grid view.
- Eventful’s free version (200+ active installs, 5-out-of-5 from 6 WordPress.org reviews) adds a Grid preset that reads your existing event data.
- The basic setup costs $0 in software and takes about 10–15 minutes once your events and featured images already exist.
- Nine steps take you from installing plugins to a published grid — no code required.
- The combined plugin stack currently requires WordPress 6.7+ and PHP 7.4+.
- Some responsive, filtering, and styling controls depend on your Eventful version — check Free vs Pro rather than assuming.
- Eventful Free displays upcoming events; past-event display depends on your plugin version.
Table of Contents
Why a Card-Based Grid Beats the Default Calendar View
The Events Calendar includes Month, List, and Day views, but it does not include a dedicated card-based event grid view in the free plugin. Its Month view is visually structured as a calendar grid, so it’s not accurate to say it has no grid at all — it just isn’t the scrollable, image-forward card layout most people mean when they ask for an “event grid.”
A card grid displays events in columns, usually with a featured image, date, and title per card, and it reads better on a homepage or a dedicated events page than a text list does. Want to see what that actually looks like before building your own? You can see a live card-based event grid first.
What You Need Before You Start
Before you begin, confirm you have: WordPress admin access, at least one published event in The Events Calendar, and featured images on those events if you want the grid to look complete. The combined plugin stack currently requires WordPress 6.7+ and PHP 7.4+, checked August 3, 2026. Everything in this tutorial is free software — hosting, themes, and any page-builder plugin you already run are separate costs this doesn’t cover.
- The Events Calendar on WordPress.org — free, 600,000+ active installations
- Eventful on WordPress.org — free, currently version 2.2.6
- A few minutes for setup, plus Eventful’s documentation open in a second tab if you get stuck
How to Create an Event Grid in WordPress: Step by Step
Here’s the full path, then we’ll walk through each step in detail.
- Install and activate The Events Calendar
- Install and activate Eventful
- Create your first Eventful layout
- Select the Grid preset
- Configure responsive columns
- Choose which events appear
- Build the event-card content
- Style the event grid
- Publish the grid
Step 1: Install and activate The Events Calendar
Start from your WordPress admin dashboard and go to Plugins > Add New Plugin. Search for “The Events Calendar,” find the official plugin, and click Install Now, then Activate. If you already have it running, skip to Step 2 — you don’t need a paid plan for this tutorial.
This is your foundation. Eventful reads event data from The Events Calendar; it doesn’t create or replace it.
Checkpoint: You should now see an Events menu item in your WordPress admin sidebar.
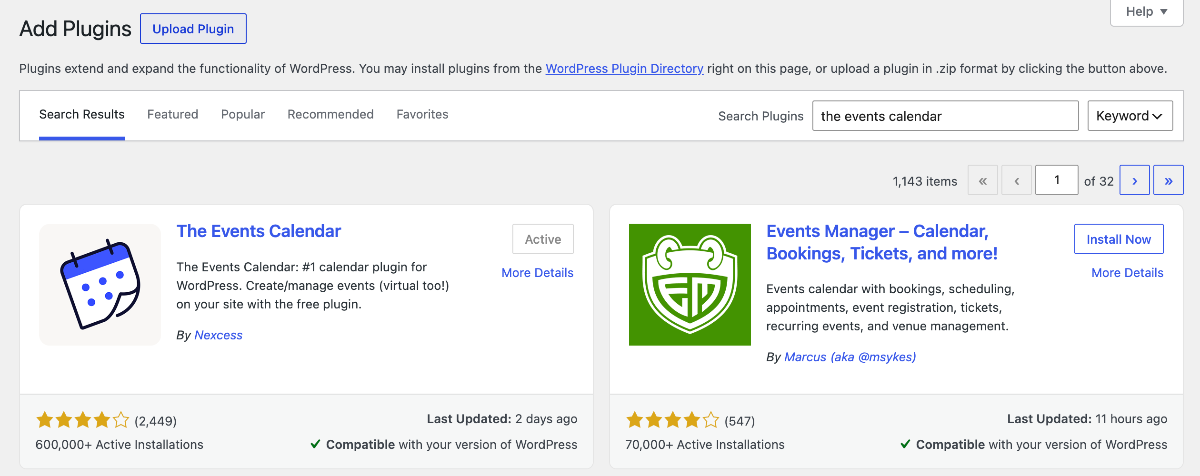
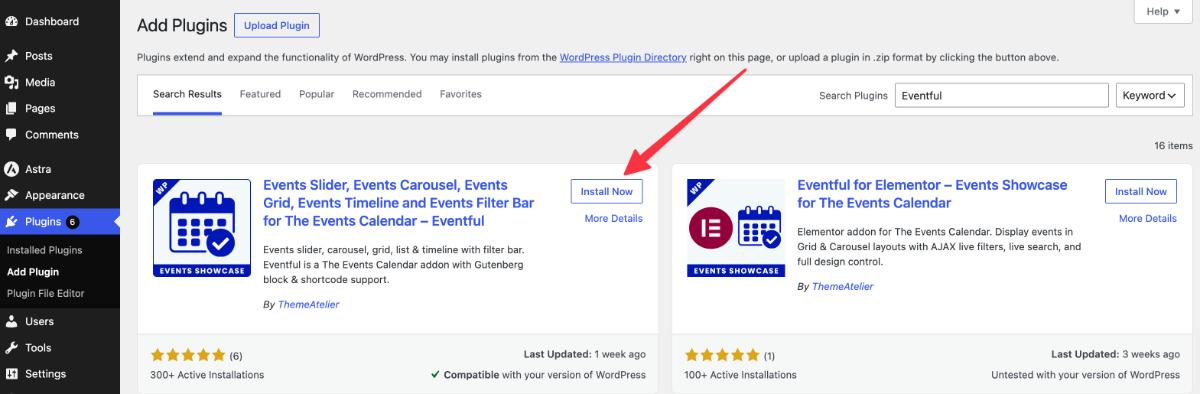
Step 2: Install and activate Eventful
Stay in Plugins > Add New Plugin and search for “Eventful.” Install and activate it the same way. Eventful is what actually builds the grid layout — The Events Calendar supplies the events, Eventful decides how they’re displayed.
Checkpoint: You should now see an Eventful menu item in your WordPress admin sidebar.
Step 3: Create your first Eventful layout
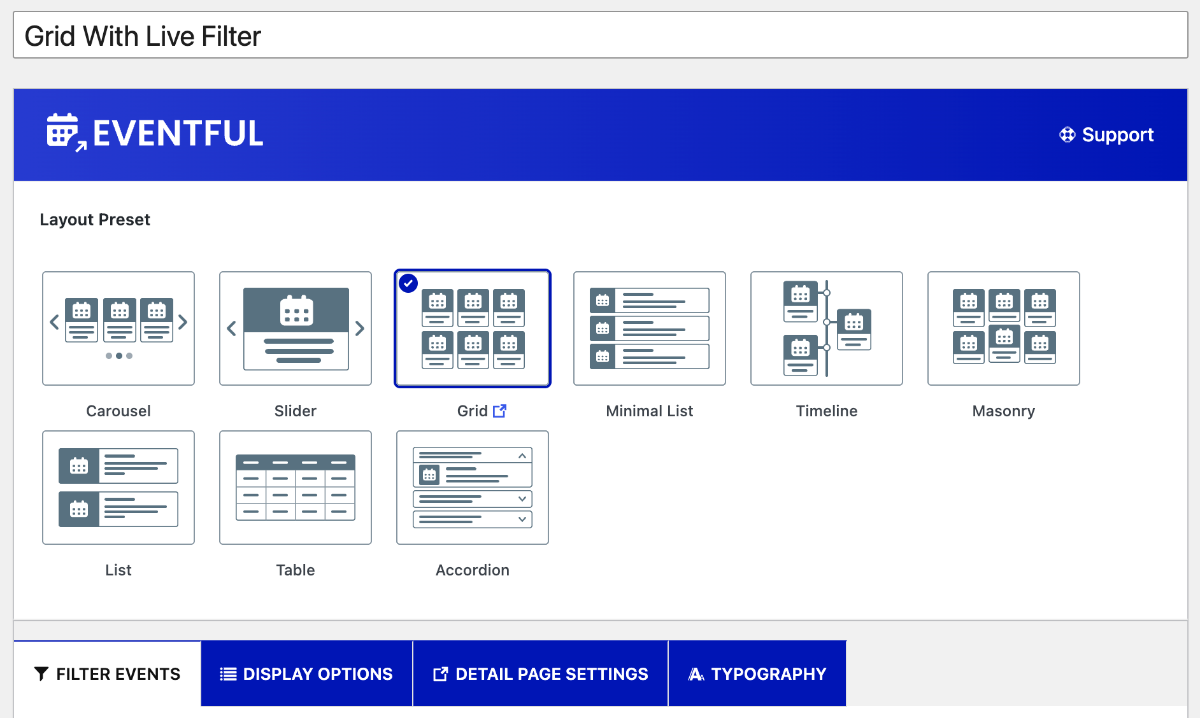
Open the Eventful menu and go to the Add New Layout screen. Give the layout a name you’ll recognize later, such as “Homepage Event Grid.” Each layout is a saved, reusable configuration — you can build several for different pages without starting over.
Checkpoint: You should now see a blank layout with a name field and a gallery of preset options.
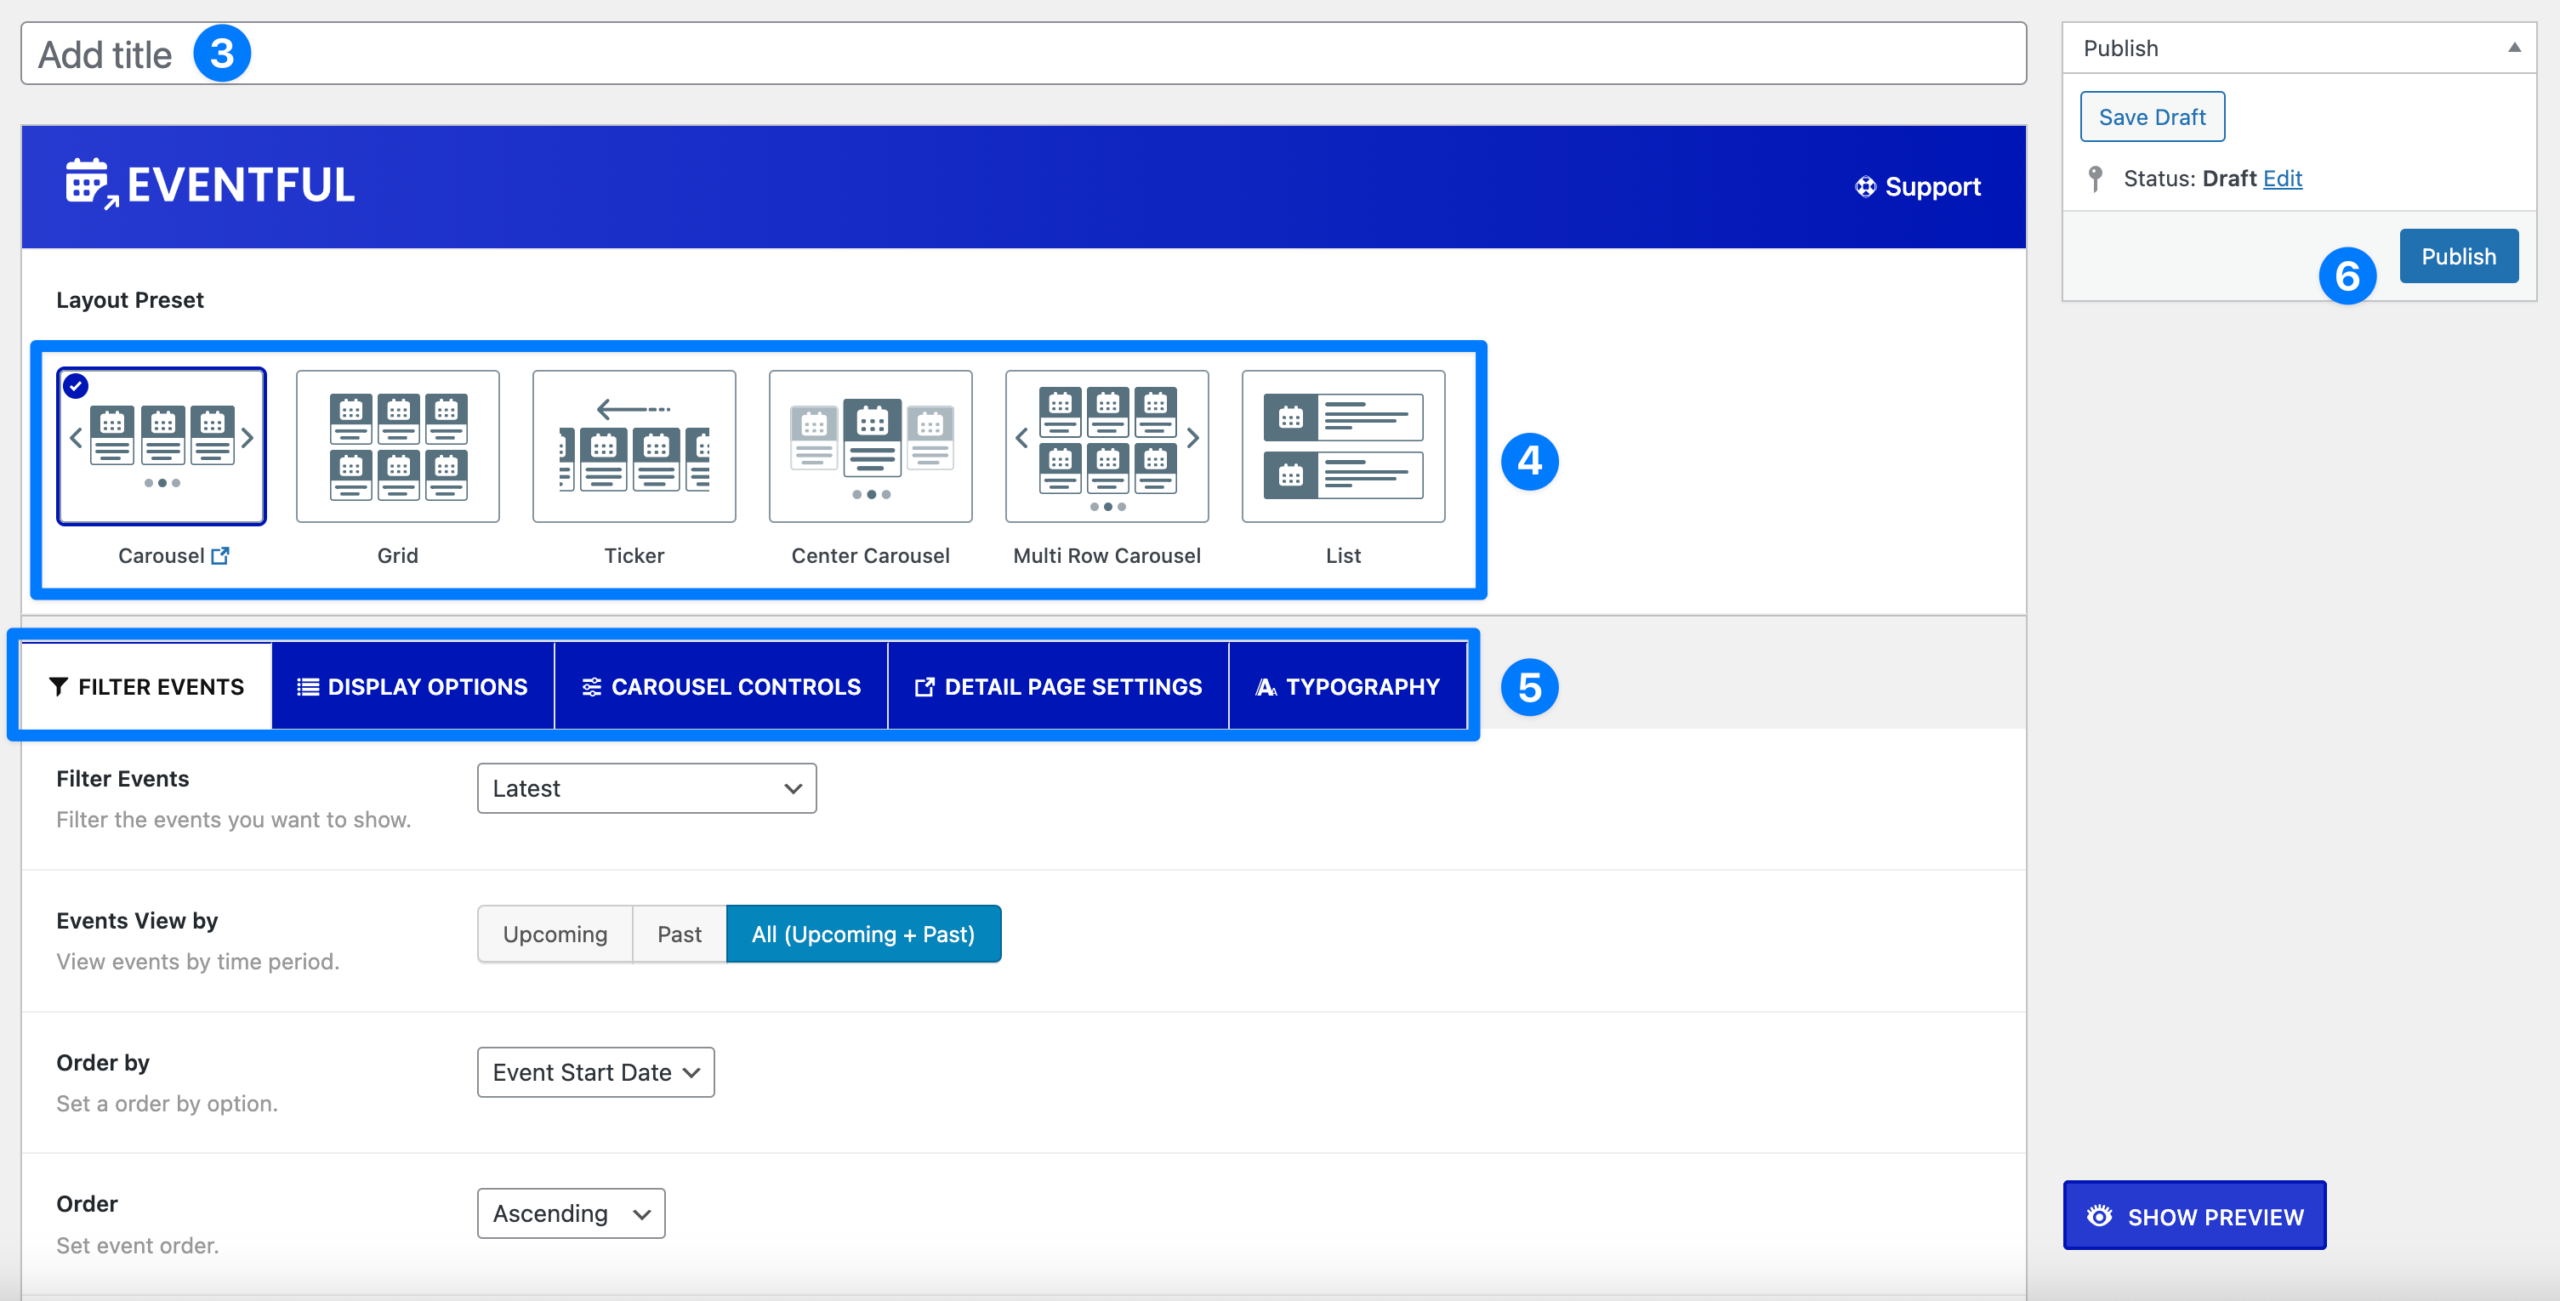
Step 4: Select the Grid preset
From the preset gallery, choose Grid. Eventful also offers Masonry, Carousel, Minimal List, and Timeline presets, but Grid is the one built around evenly spaced cards in columns, which is what “event grid” usually means. The Grid preset itself is available free.
Checkpoint: You should now see a preview of event cards arranged in a grid layout.
Step 5: Configure responsive columns
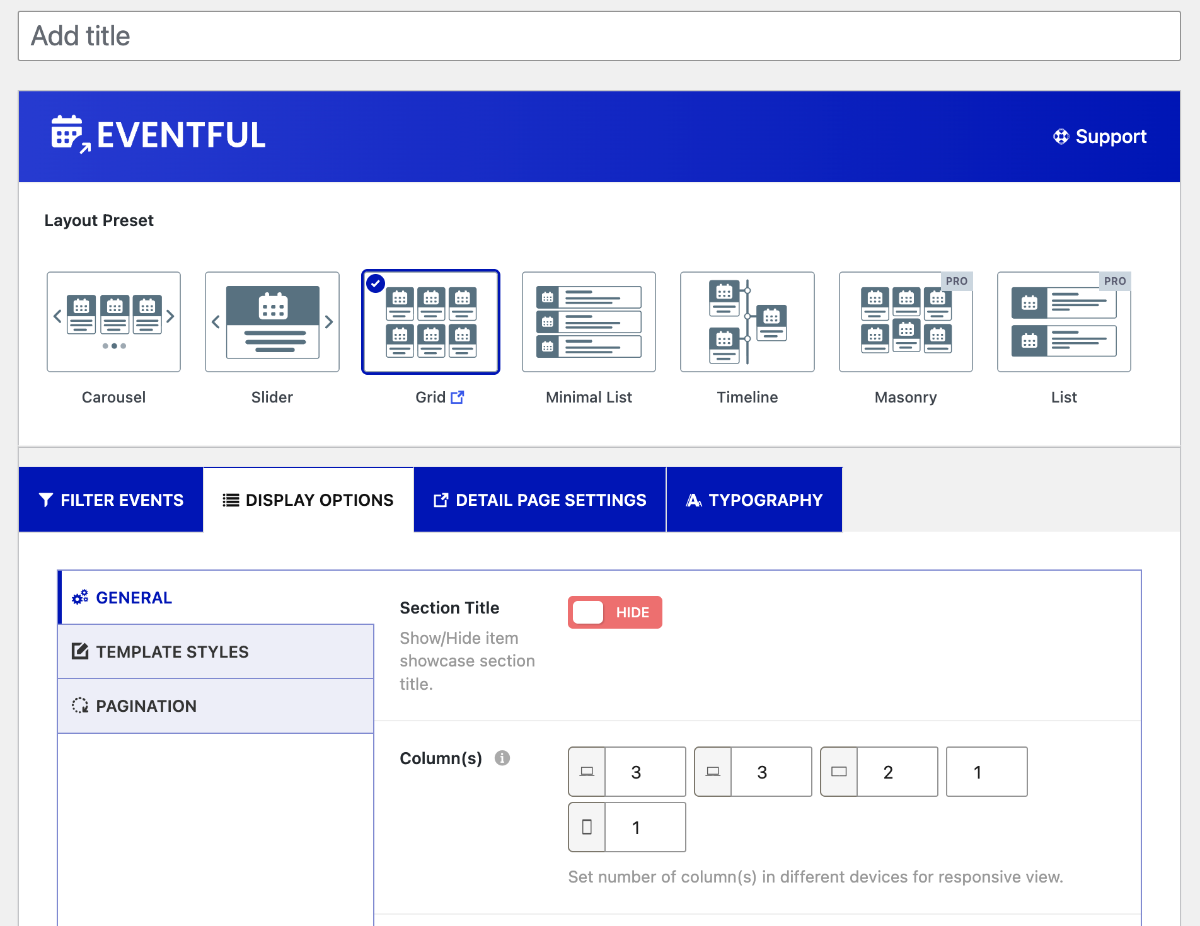
Open the responsive column settings and set how many cards appear per row at each screen size — a common starting point is 3 columns on desktop, 2 on tablet, and 1 on mobile. Save your changes. This step matters because a grid built for a wide monitor can look cramped or broken on a phone if the column counts aren’t set separately.
The exact controls available here can depend on your Eventful version — check the current Free vs Pro comparison if you don’t see the breakpoint you expect.
Checkpoint: You should now see column values saved for desktop, tablet, and mobile.
Step 6: Choose which events appear
Find the event-query controls, usually where you tell the layout which events to pull in. Set it to show upcoming events, and narrow it further by category if you only want, say, workshops or fundraisers on this particular grid. Leave it unrestricted if you want everything upcoming to show.
This is where you control featured or selected events too — the query is what decides the grid’s content, not the styling.
Checkpoint: You should now see your event-query settings saved with the event source you selected.
Step 7: Build the event-card content
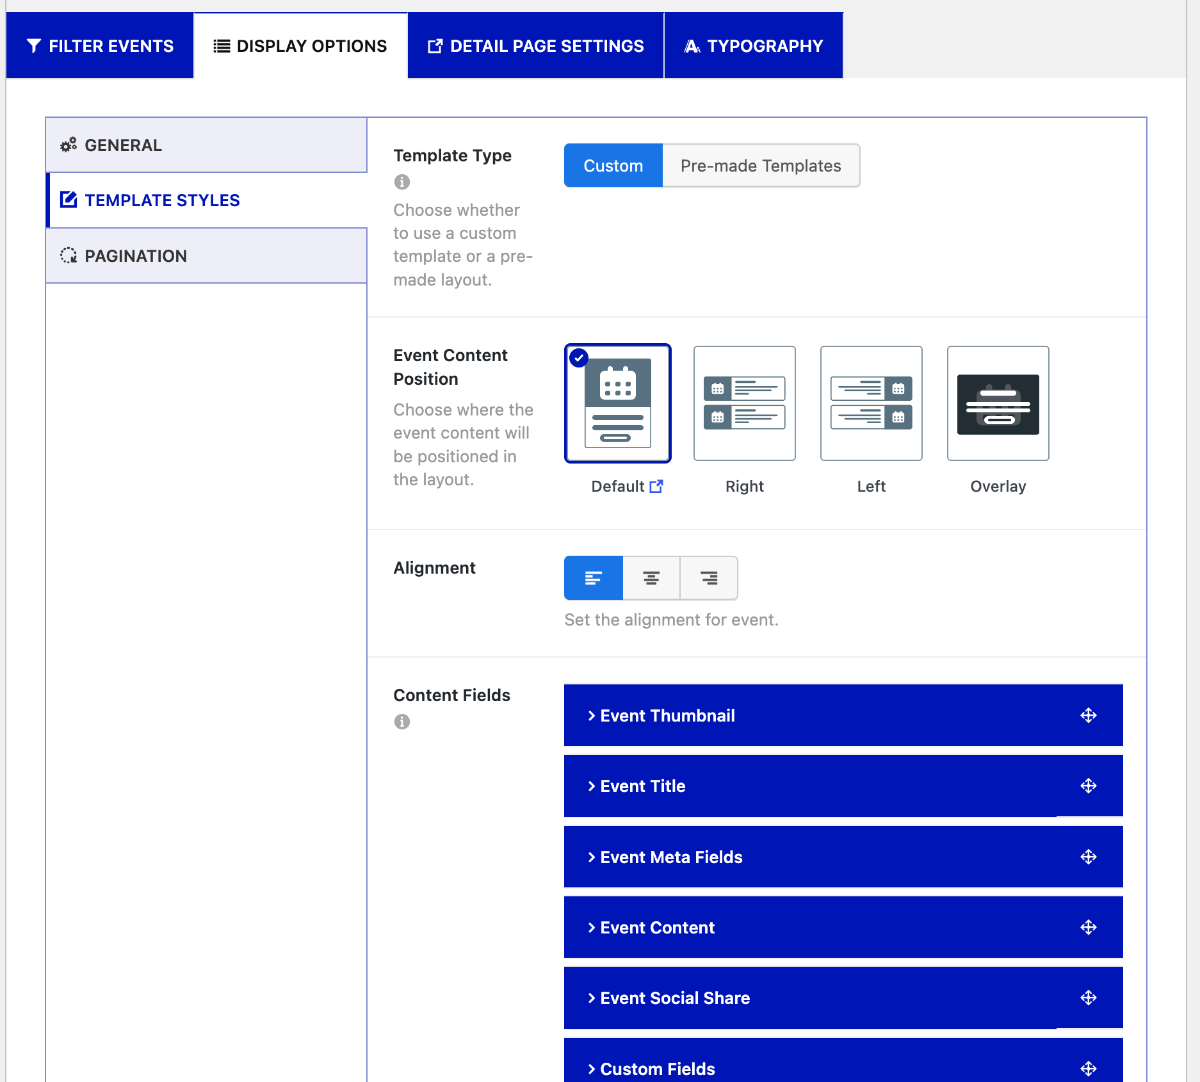
Open the card-content ordering section and choose which details show on each card. A title, date, and featured image are the minimum most sites want; venue name is a common fourth field. Fewer fields generally read better than more — a crowded card is harder to scan than a simple one.
How many custom fields you can add and reorder here can depend on your Eventful version — again, see what’s covered in Free vs Pro if a field you want isn’t available.
Checkpoint: You should now see your chosen fields listed in the card-content section, in the order they’ll display.
Step 8: Style the event grid
Open the grid’s style settings — typically colors, spacing, and typography — and adjust the card background, button color, and text to match your site’s branding. Small adjustments here go a long way toward making the grid look like it belongs on your site rather than bolted on.
Deeper typography controls, including expanded font libraries, may require Eventful Pro depending on your version. Basic color and spacing adjustments are part of the free setup covered here.
Checkpoint: You should now see your updated colors and spacing saved in the style settings.
Step 9: Publish the grid
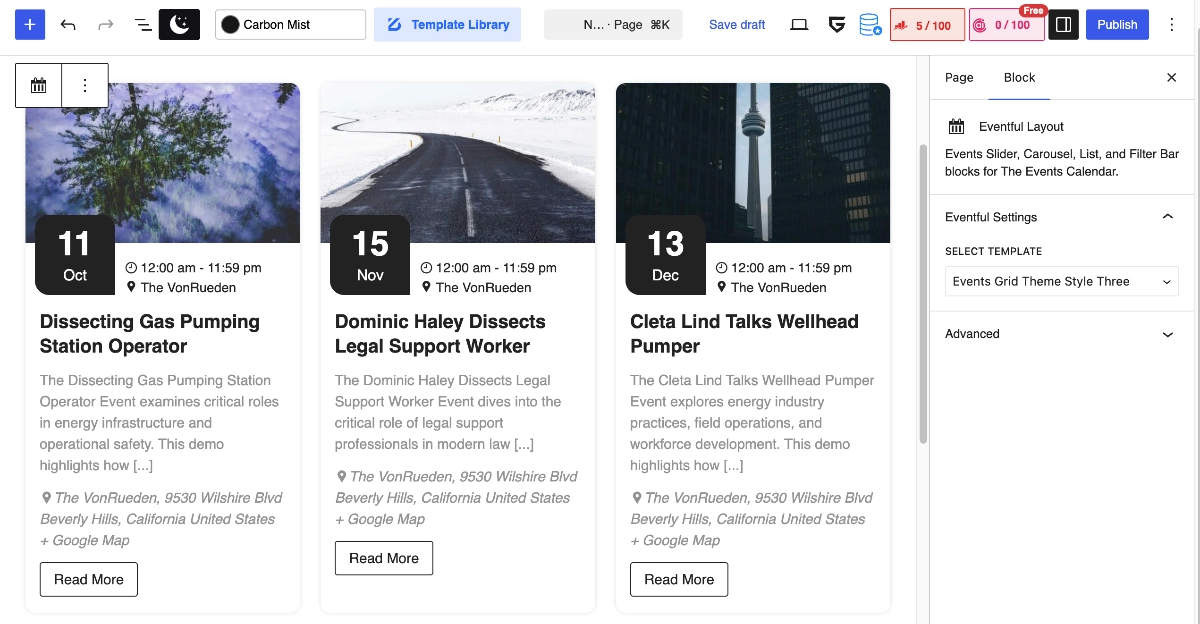
Save the layout. Eventful generates a shortcode you can paste anywhere, or you can add the Eventful Layout block directly in the Gutenberg editor and select your layout from its dropdown. Either way, place it on the homepage or a dedicated events page.
Your generated shortcode will look like the example below — the ID is unique to your layout, so copy the actual code from your Eventful screen rather than reusing this one:
[ eventful id="123" ]123 is a placeholder. Your real shortcode will include the ID Eventful assigns to your specific layout.
Checkpoint: You should now see your event grid displayed live on the published page.
Most straightforward setups can be completed in about 10–15 minutes once the events and featured images already exist.
Troubleshooting Your Event Grid
Grid not appearing
Confirm The Events Calendar and Eventful are both active, the layout is published, and at least one future event matches your query settings. Then double-check that the correct block or generated shortcode was actually inserted on the page.
Only one desktop column
Check the desktop column value in the layout settings first. If that looks correct, check the width of the containing Gutenberg group or page-builder column, and whether your theme applies a narrow content-width limit. Clear browser and site caching before testing again.
Images crop badly
Use featured images with consistent aspect ratios across your events, and review any hard-crop or adaptive-height settings in the card style options. Avoid mixing extremely tall portrait images with very wide landscape ones. Only regenerate thumbnails if existing WordPress image sizes turn out to be the actual cause.
Past events missing
Eventful Free is limited to upcoming events according to its current product boundary — this isn’t a bug. If you need a past-events archive alongside the upcoming grid, review the Free vs Pro comparison for what that requires.
Theme styling conflict
Temporarily disable your theme’s custom CSS to see if the grid displays correctly without it. If so, your theme is likely overriding card, button, image, or heading styles. Avoid editing PHP templates to work around this — for unresolved plugin-specific conflicts, contact Eventful support directly.
Before contacting support, have this ready:
- WordPress version
- PHP version
- The Events Calendar version
- Eventful version
- Theme name
- Page URL
- A screenshot of your layout settings
- Any browser console error, if one appears
When You Might Need Eventful Pro
Everything in this tutorial works on Eventful’s free version. You’d look at Eventful Pro if you consistently hit the version-dependent boundaries flagged above — finer responsive control, more card-content fields, expanded typography, live category or tag filtering for visitors, or a past-events view. As of August 3, 2026, Eventful’s standard pricing starts at $49/year for one site; confirm Eventful’s current pricing and see the Eventful Pro documentation before upgrading.
Want to compare grid designs before deciding? You can compare the available grid designs in the live demo.
FAQ – Event grid in wordpress
Does The Events Calendar have a grid view by default?
No. The Events Calendar includes Month, List, and Day views, but it does not include a dedicated card-based event grid view in the free plugin. Its Month view is visually structured as a calendar grid, which is a different layout from a scrollable card grid of event listings.
Is Eventful free to use with The Events Calendar?
Yes. Eventful’s free version, currently at 200+ active installations with a 5-out-of-5 rating from 6 WordPress.org reviews, works with The Events Calendar’s free plugin. The Grid preset used in this tutorial is available free; some styling and filtering options may require Eventful Pro.
Can I filter the event grid by category or tag?
You can choose which events populate the grid — including by category — through the layout’s event-query settings. Whether visitor-facing live category filters are included depends on your Eventful version; check the current Free vs Pro comparison for the exact boundary.
Why is my Eventful grid only showing one column on desktop?
This usually means the desktop column value wasn’t saved, the containing page area is too narrow, or your theme applies a content-width limit. Check the responsive column settings first, then check the width of the surrounding page section and clear any caching.
Can the free version of Eventful show past events in the grid?
Eventful Free is limited to upcoming events according to its current product boundary — this isn’t a bug. If you need a past-events view alongside upcoming events, check the current Free vs Pro comparison for what that requires.
Do I need to know how to code to set up an event grid?
No. The full setup in this tutorial uses only the WordPress admin dashboard, Eventful’s layout editor, and a Gutenberg block or shortcode — no PHP, CSS, or template editing is required for the basic grid.
Conclusion
Nine steps, no code, and a plugin stack that costs nothing turn The Events Calendar’s plain event list into a grid people actually want to click through. Install both plugins, build a Grid layout, set your columns and card content, style it to match your site, and publish. If you want a reference while you work, open the finished Events Grid demo in another tab.